
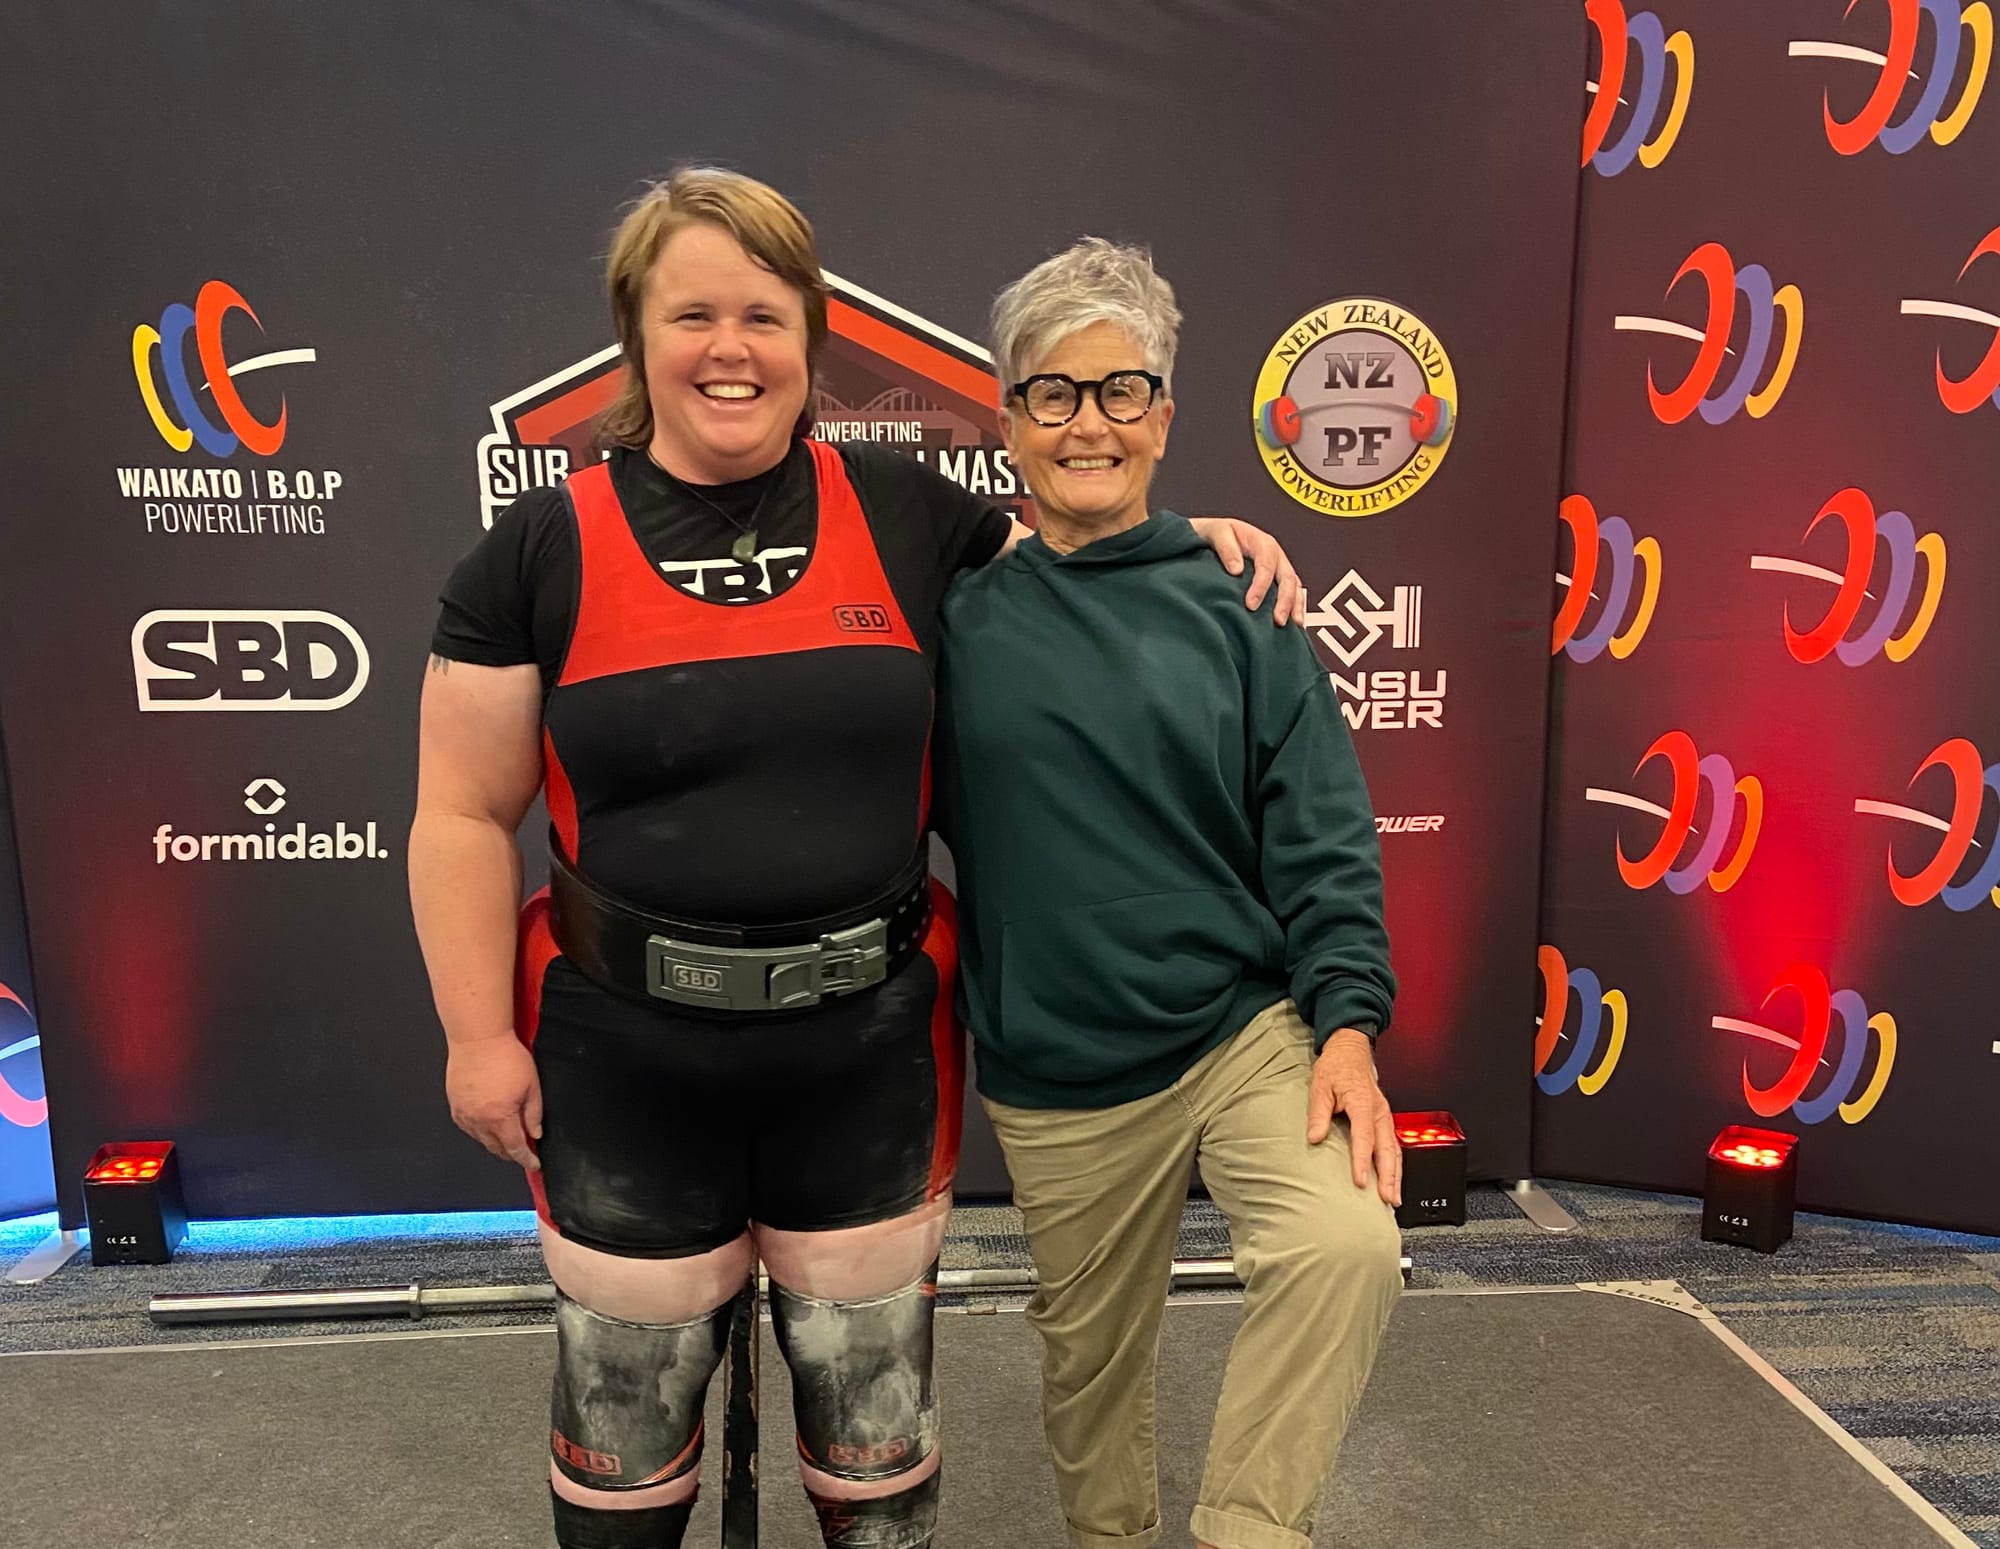
So you're doing your first powerlifting competion?
When Carl and Megan were doing their first powerlifting competition, they had more questions than clues. Luckily, where they were going, Mon Leather has been before. As both a lifter and as a referee. And because she's a deadset legend, Mon sent us a 2,500 word brain dump email, answering every question you could possibly have.
This seemed like the kind of public service we're here for, so we are preserving this excellent piece of work for posterity. Thanks Mon! Nervous lifters of the future salute you.
First Admin: Weigh-in, Gear Check, and Rack Heights
Weigh-in
This is your first priority on the day, and it is strictly time-bound. You’ll be assigned a random lot number, which determines your order. When the person before you heads in, it’s good etiquette to have your shoes and outer layers off so the process can move quickly.
In the weigh-in room, there will be one or two referees (same gender as you). Once inside, you strip down to your underwear to weigh in. This process is quick and not particularly interactive—they note your weight, and then ask for your openers:
"What are your openers?"That means: your planned first attempts for squat, bench, and deadlift. Have them written down or on your phone—this is the only thing you really need to bring with you. They’ll enter your numbers into a spreadsheet and send you on your way.
Gear Check
Bring your whole gym bag to the gear check table. A referee (or someone with similar experience) will inspect everything you plan to wear or use on the platform—belt, wrist wraps, knee sleeves, shoes, etc.
WCPA follows IPF gear standards: IPF Approved Equipment List. Read the competitors’ email carefully to know what’s allowed.
- T-shirt and shorts: must be plain, non-compression, minimal logos.
- Socks: Long socks (to the knee) are compulsory for deadlift. Check yours fit properly—tight calves can cause unexpected shortfall (ask me how I know). Many first-timers end up doing a last-minute dash to the Warehouse for rugby socks.
- Belts, sleeves, wraps: Must be IPF-approved if specified by the competition.
Tip: Some gear shows up second-hand on TradeMe. For example, an Iron Tanks belt (IPF approved) might be $280 new, but $80 second-hand. Suppliers like Strength Gear (affordable) and Raise Lower (they have SBD, the biggest brand) stock gear locally—just double-check it’s comp-legal.
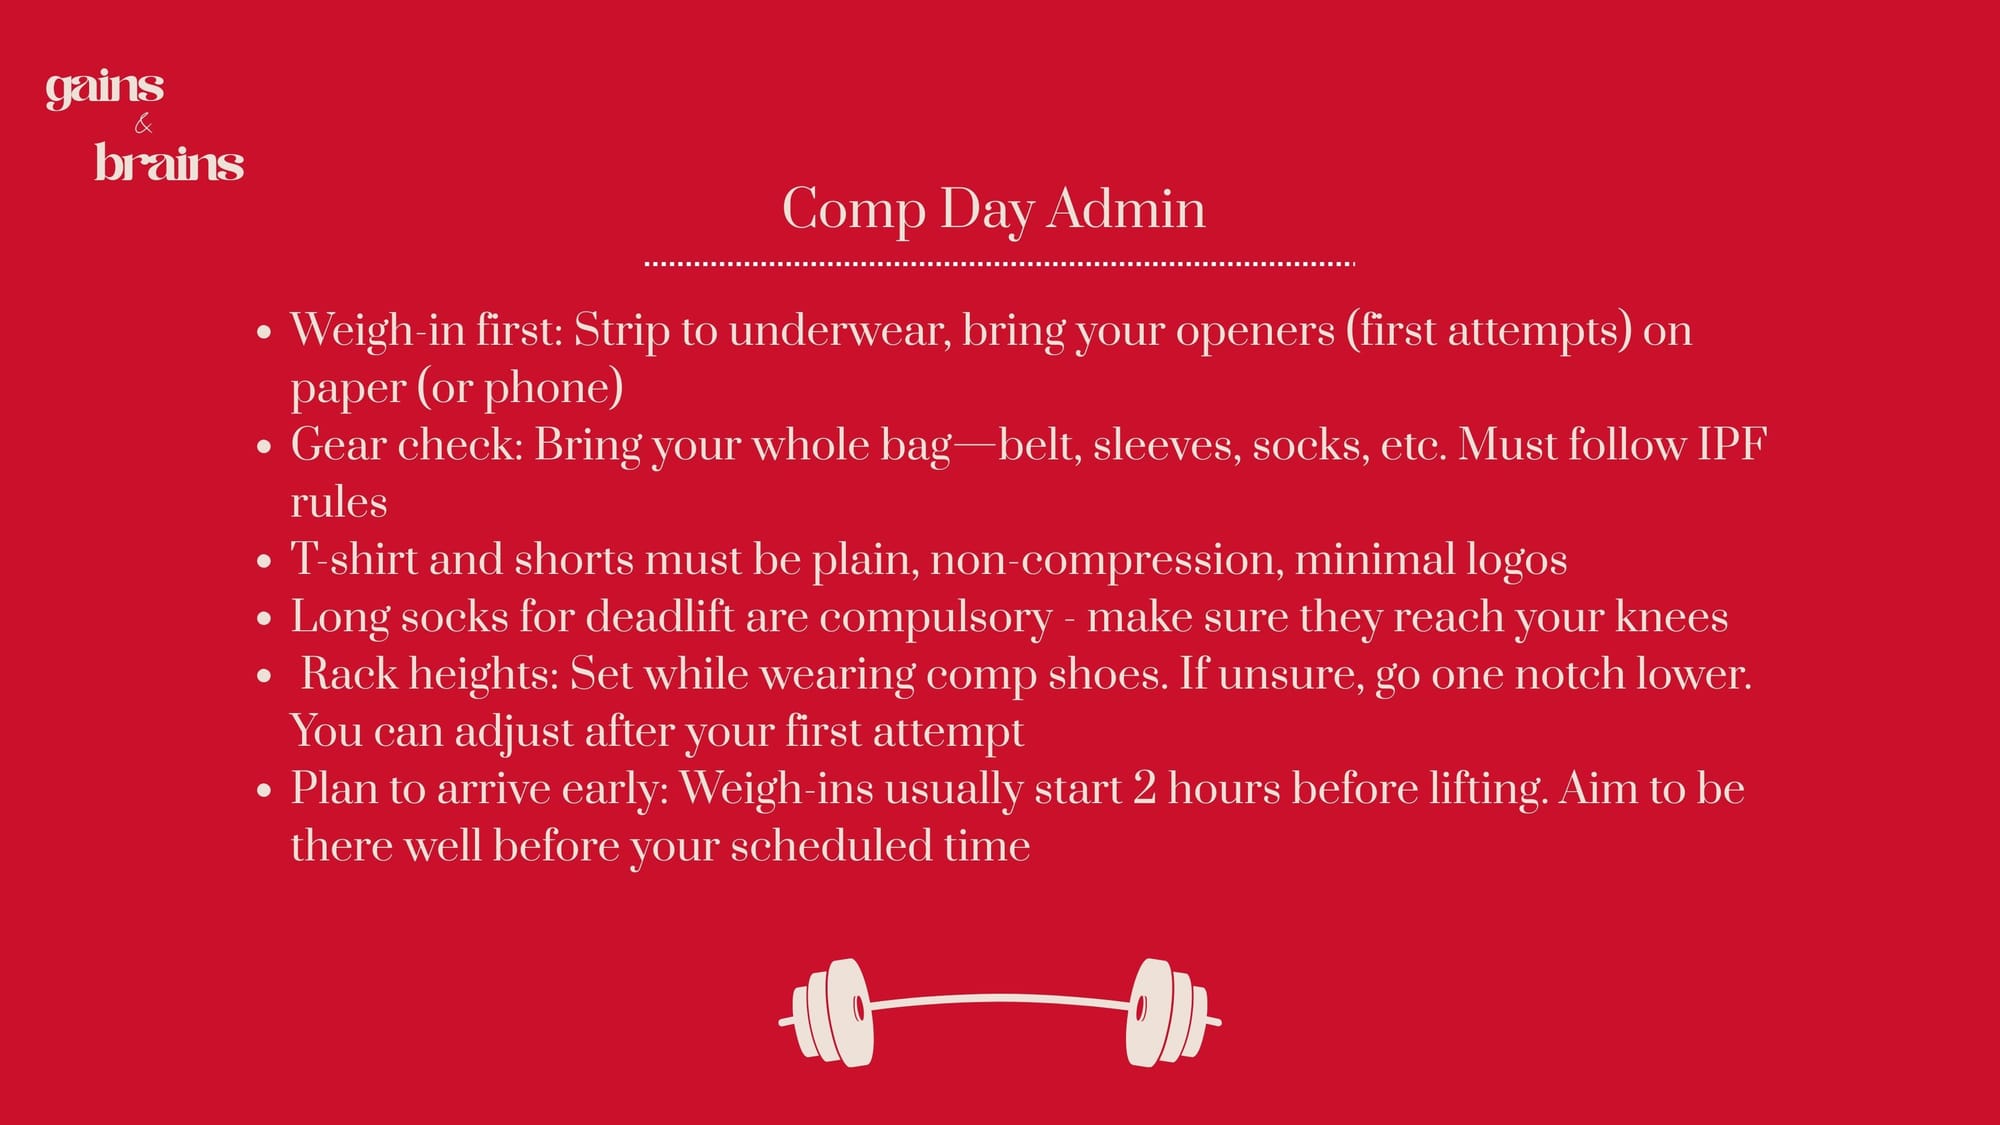
Rack Heights
For rack heights, put on the shoes you will wear for squats. The organisers will designate the rack where they are measuring (it needs to be the same model as the competition rack). Try unracking the bar and adjusting until it feels similar to what you’re used to in training. Volunteers will be on hand to help adjust and record your height—they’ll happily do this several times until you're confident with it.
If in doubt, it’s common to go one notch lower, as unracking a max load feels very different to unracking an empty bar. If you decide during your first attempt that the rack height feels off, you can ask for it to be changed when you submit your next attempt at the desk.
Bench rack heights may also be recorded, though this isn’t always done at novice comps.
Downtime and Warm-up Area Setup
After all your admin is done, you’ll have some time to eat, hydrate, and relax. This is your chance to:
- Layer up to stay warm (winter gyms are cold)
- Connect with people and be a little bit social Chat with other lifters. here will be people who have competed plenty, and there will be a lot of folks who are nervous for their first competition experience.
- Most people drop their stuff somewhere in the warmup area and sort of set up camp in a spot they keep going back to. If you can identify people who are in your flight and/or are the same height as you, then you might be well-served to aim near them so you can share a rack with them for warmups.
Don’t be put off if people seem a bit staunch—it’s usually nerves. Everyone is in the same boat, especially at a novice comp.
Warm-ups
Write down a clear plan for your warm-up: general movement, mobility work, and the barbell sets and reps you'll do at defined weights. This plan should reflect your usual warm-up routine—the same movements, the same kind of rep ranges, and the same kilogram jumps you’re used to in training.
It can be tempting to get caught up in the new environment and want to try something you saw on Instagram or copy someone doing fancy mobility work on the floor. Don’t. This is not the day for new things. Stick to your plan.
Don’t assume equipment will be available—even if you're in a gym, there are no guarantees. If you normally use a foam roller or resistance bands, bring them with you.
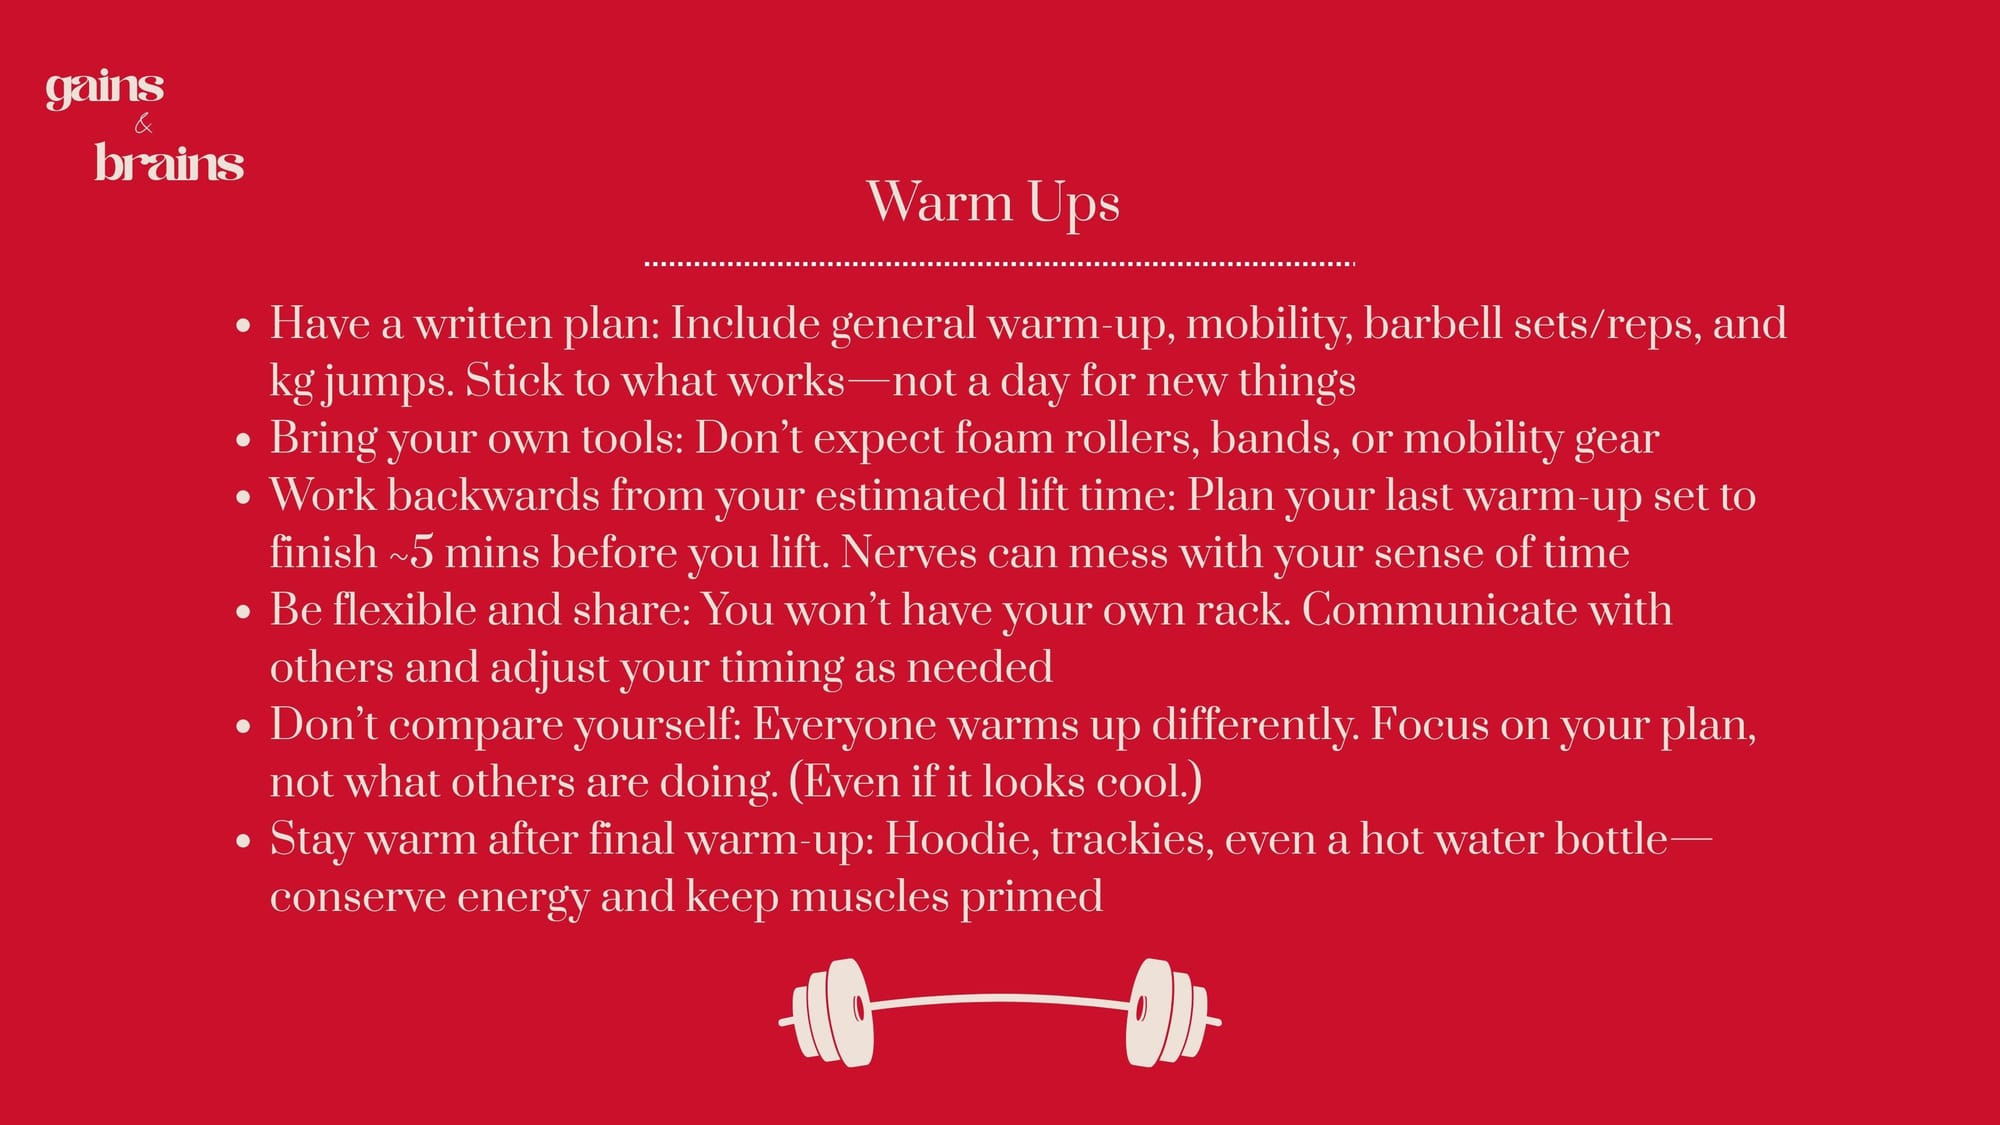
Timing Barbell Warm-ups
Timing is a bit of an art. You want your final warm-up to happen just a few minutes before your first attempt. That timing will depend on where you sit in the flight order (start, middle, or end).
Work backwards from that:
- Take the number of warm-up sets you’ve planned.
- Space them 3–5 minutes apart (or whatever you’re used to).
- From there, estimate when to begin warming up.
Stick to your plan. Time your rests—adrenaline can distort time and make 30 seconds feel like five minutes.
Be prepared to adjust slightly. You won’t have your own rack; you’ll be working in with others. You might need to shift a few minutes earlier or later depending on how others are loading the bar.
Don’t stress about what other people are doing—they may be warming up faster or slower, using different weights or rep schemes. Trust your own plan.
After your final warm-up, put on a hoodie and stay warm. Keep close to the platform area and stay focused.
Attempt Selection
This might be the greatest art of the day.
Rules
- You can’t decrease weight between attempts.
- You can repeat a missed lift, but must notify the desk—otherwise, they’ll default to a 2.5kg increase.
Strategy
Have a Plan A (feeling good) and a Plan B (if you’re off). Here’s a good structure:
- First attempt: Choose something you’ve done comfortably in the gym before—this is about getting on the board. There should be no doubt you can hit it—ideally, you could do two reps with a long pause (for bench) if needed. Keep in mind that being on the platform can feel strange—either exhilarating or like your brain has left the building. Make this attempt calm, safe, and confidence-building.
- Second attempt: This is typically close to your gym max. The lift might feel a bit harder in comp conditions—adrenaline, unfamiliar routines, and stricter form can all play a role—but it should still have solid precedent in your training.
- Third attempt: If the first two lifts went well, this is where you go for it—your absolute max. It can be a ‘Hail Mary’ if you’re riding the wave of adrenaline, or just a stretch goal. If something earlier didn’t go to plan and you missed a lift, this is your shot to make progress through the plan and finish strong.

Submitting Attempts
After your first and second lifts, you have 1 minute to submit your next attempt.
Keep your attempt cards and pen near the platform. Know what you want to do next. If you have a handler, they’ll stand ready to submit it for you.
If you don’t submit in time, the desk enters a 2.5kg increase by default. At novice comps, they’re usually lenient—but don’t rely on it.
The actual Lifting
After warm-ups, when your flight is about to start, take your gear for that lift: headphones, attempt cards and a pen, plus a drink. Head over to the platform area.
The rules: loiter near the platform when your flight starts. There will not be much fanfare, they generally just start on the dot of the start time. They will say:
“Bar is loaded.” You have 1 minute to start your lift.
A Technical Controller will stop you from going early and check your gear before you go on.
Squat
Calls: SQUAT → RACK
- Unrack in your own time.
- When feet are still and knees locked: "SQUAT."
- Squat, stand up, lock out, and wait for "RACK."
Unrack the bar by yourself in your own time. Referees are looking for you to be still, when you stop moving your feet and lock your knees the ref will say “squat”. It’s ok to squat after that but it’s not an immediate command, squat in your own time. Down and up, and at the top be still and stable again with knees locked. When the ref says “rack” you step forward and rerack the bar - spotters will help guide the bar in.
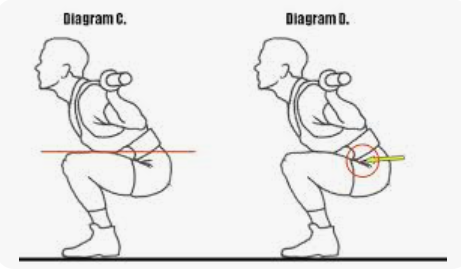
Pitfalls: Aside from following the calls, depth is the main thing that gets people with squats. Hip crease below the top surface of the knee is what referees are looking for. It is in your interest not to let baggy shorts or T shirt obscure your hip joints - I would go so far as to tuck my T-shirt in to be sure.
Bench Press
Calls: START → PRESS → RACK
A spotter will be standing nearby as you approach the bench, watching for your cue. If you nod, they’ll assist with the lift-off. If you shake your head, they’ll step away. You can also give them a specific unrack cue if that’s part of your setup.
Lie down and set up as you normally would. Once you unrack the bar, wait—don’t start moving right away. The referee is looking for:
- Elbows locked
- Bum on the bench
- Feet (especially heels) flat on the floor
- Stillness
Only when those are in place will you get the first call: “Start.”From there, bring the bar down to your chest in your own time.
Once the bar touches your chest, the referee will watch for it to become motionless—this may take a second or two. Only then will you hear the second command: “Press.”
Press the bar back to the top, lock your elbows, and hold steady until the final call: “Rack.” Spotters will help guide it in.
Pitfalls:Bench calls can trip people up—there are three of them, and if you jump the gun, it can cost you the lift. Practice them in training.
Also, the pause can be challenging if you usually train with a “touch and go” style. Take the time before your comp to get used to pressing from a full stop.
Deadlift
Call: DOWN
You step onto the platform and lift the bar in your own time—no need to wait for a start command. You must reach a fully locked-out position with your knees straight, shoulders back, and your body still. When the referee sees this, they’ll give the “Down” command. Only then can you lower the bar—and you must keep your hands on it until it’s on the floor.
If you can’t hear the referee over the crowd, watch for a hand gesture toward the floor—that’s your visual cue.
Pitfalls:By this point in the day, you’re likely to be fatigued. That’s when technique can slip. The most common errors are:
- Letting the bar rest on your thighs
- Hitching (jerky movements where the bar moves up and down as you lift)
Either of these will result in a no lift.
Referee Lights and Feedback
- White light = Good lift (met the rules)
- Red light = No lift
There are three referees. You only need a majority of white lights (2 out of 3) for the lift to count.
If you receive a red light and want to know why, ask the referee immediately after the lift. Either you or your handler can do this politely. If you wait too long, they’re unlikely to remember the specific reason.
Mental Focus and Cues
Some people like to visualise their lifts ahead of time; others rely on verbal cues to stay focused during the lift itself. It’s completely normal—especially for newer lifters—for your mind to go completely blank on the platform. You might unrack the bar and suddenly forget how to squat. In that moment, your brain can get very busy, very fast.
That’s where cues help.
Keep them short and simple—ideally single words, and no more than three per lift. I write mine down on my warm-up/attempt sheet.
Example: For squats, I use:“Brace. Knees. Up.”These are my personal triggers, the ones that anchor me when things feel wobbly.
Your words can be anything that makes sense to your brain—but keep them concise. Figure them out in training and practice using them, so when the nerves hit, you have something familiar to fall back on.
Nutrition
This is not a day for new things—stick to what you usually use to fuel your training sessions.
The Fiercely Fueled principles apply:
- Prioritise easily digested carbs for quick, available energy
- Include a bit of protein to keep you satisfied
- Save fats and fibre for after the comp—they slow digestion and can make you feel sluggish
You don’t need a massive amount of food—powerlifting comps don’t burn a huge number of calories—but you do need enough glucose to keep your brain sharp and focused. That’s what prevents you from mentally tapping out halfway through.
Use caffeine strategically. It won’t carry you through the whole day, so dose it like you would in training. And again—not a day for experimenting with new pre-workouts or caffeine bombs you’ve never tried before.
Energy Management
This might be the biggest puzzle of comp day. Most of us don’t train squat, bench, and deadlift (SBD) all in one session very often—and when we do, it’s usually on our own efficient schedule, not stretched over four hours in a high-adrenaline environment.
What took me several comps to learn: you need to keep something in the tank—or find ways to refill it as you go.
Stay on top of your carb intake, and build in quiet downtime when you can. Step outside, take a breath, reset your nervous system.
Some comps can be exciting and overstimulating—and even cheering and clapping can burn through your energy stores faster than you think. They also spike your adrenaline, which can crash hard later.
Be intentional about where you spend your energy. Save something for deadlifts.
After the Comp
Don’t be surprised if you’re:
- Not sore
- Not hungry
- Mentally fried
This is neural fatigue. It can feel like jet lag or a hangover.
In the following days:
- Hydrate
- Eat well
- Move gently
- Let yourself rest
You might feel like you never want to lift again. That’s normal. It fades.
Final Thoughts
Have questions? Reach out to us or ask someone on the day. Powerlifting communities are generally full of people who love to help.
Plan as well as you can and then go with whatever happens on the day. Best of luck and enjoy!